


TIPS & TRICK ON HOW TO USE FREE SCENE CREATOR
Do you want to create your own mockup from scratch? Easy! All you have to do, is download some items from the items library and start arranging them your way. Below are some tricks that will help you make your mockups look even better.
Use adjustment layers
This is probably the most important thing. Remember to add one adjustment layer with higher contrast to the top of the layer list. It is only up to you how you do it and what values the contrast should take. I usually use Curves with the setting below.
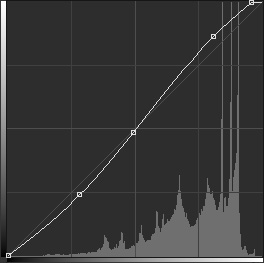
You can also use Levels, Brightenss / Contrast and even add a LUT file found on the network. It may also be a good idea to add some light in a certain color. For this, I use a Photo Filter with Blending Mode set to Soft Light and Opacity set to 20%.
You can see the exact settings I use in most of my mockups and also in the startup scenes. Just remember that adjustment layers should always be at the top of the layer list.
Play with the layers in the items.
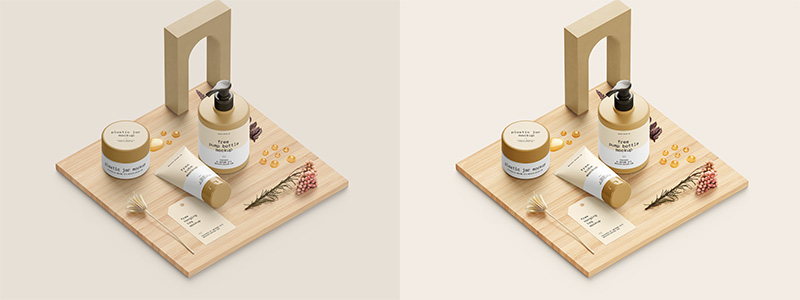
I tried to make each of the items in the library as best as possible. But there is no such thing as the world’s best setting. Sometimes it is worth reducing the opacity of the “Highlights” layer a bit, sometimes tweaking it a bit using Levels.
Exactly the same goes for the shadows under the item. Depending on the background color, sometimes the shadow should be slightly reduced, sometimes increased. If the shadow is too weak even, with the opacity set to 100%, duplicate the layer with the shadow and reduce the transparency a bit.
Playing with the contrast and transparency of individual layers will be especially useful with transparent objects, such as water drops.
Not all mockups are perfect
Yes, I admit. Not all mockups I make are perfect. I can promise you that I always try to do them on 100%, but I’m only human and I make mistakes. If you see them, you can correct them yourself, it would also be great if you could contact me about any errors you find. I will be happy to correct it.
Perspective or ortographical…
I had two views to choose from when making mockups for free scene creator. Perspective or orthographic projection. I choosed the perspective view, because I think it is more pleasant and natural for the human eye. Unfortunately, there are some problems with this. If you put two items with straight edges together, their lines (perspective) will start to diverge. Sometimes it is enough to adjust the position of the items a bit to hide this fact a bit from the eye, but sometimes you will have to use perspective correction.
In the starter scenes that I share, you can see that the perspective is slightly skewed, but in my opinion it is so invisible that I don’t care at all. However, if it bothers you, first arrange your entire scene so that you can work on the final arrangement of the elements. And then correct their perspective with the Distort tool.
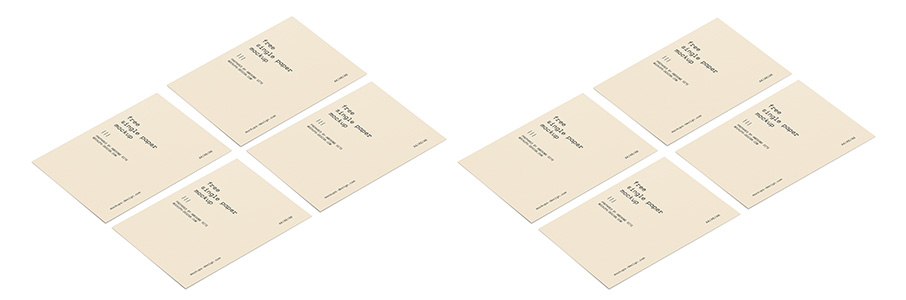
Remember that the above example is quite exaggerated. Usually in similar scenes you will use more items, and the whole layout will much more irregular. And it will be much harder to see any distortion in perspective.
Have fun
Arranging mockups from ready-made elements is really great fun. Sure, Photoshop isn’t a 3D program, a lot of things can look a bit fake. However, if you create a nice scene using the rules of composition and choose nice colors, no viewer will pay attention to minor imperfections. Have fun, try new things and experiment.
Share your work
Do you think you’ve made a nice scene with a cool designs? You can send it to me as a jpeg file, and maybe one day we will show it to other users on Facebook and Instagram pages of mockups-design.com. Who knows, maybe one day we will manage to create a gallery of your projects with links to your pages?